When you want to use cloud computing solutions from AWS, Azure, Google Cloud Platform or any others. You will probably need at some point a virtual machine. And what’s the most interesting about Cloud providers is that you will pay only for what you’re using. That’s mean that if you can automate the shutdown or the start of a Virtual Machine, you will be billed only for the moment when the VM is running.
When your VM is executed, you will be billed for everything: CPU, power, RAM and every resource you’re using but also storage. When the VM is shutdown, you will be billed only for storage, that is a lot less expensive.
In my scenario, I have several Azure subscriptions with a few numbers of credits. The interest for me is to be able to use it exactly for what I need and shutdown things when I don’t use it to save my credit! 🙂
Let’s check how we can do this in the Microsoft Cloud: Azure.
First, create a test virtual machine and think about when you will need it. In my example, I want to create a virtual machine that I will use as a low-cost remote virtual desktop when I’m moving and bringing only my Chromebook or iPad (and need Windows Apps).
So, I will choose the latest version of Windows 10, hostname, subscription, location, resource group but also, I will use (automatically) the « Azure Hybrid Benefit« . That’s mean, you can avoid to pay the licence of a Windows Server or Desktop if you bring / use licences that you’re already owning. In general, you can save up to 40% of the standard cost for the same virtual machine with an integrated paid licence in Azure.
For my needs, I will use the size: B4ms with 16 GB of RAM and 4 vCPUs. More information on the B-Series introduced by end of 2017, by following this link. Should be quite enough for my usage scenario.
To be able to automatically process the shutdown of your virtual machine, it’s quite easy with Azure. The best way to do this is to configure the specific option when you’re creating your virtual machine.
Do not forget to choose the time zone that will correspond to your country. In the above example, I have selected to automatically shut down the VM at 10.30 AM but choose the schedule that will suit your personal needs.
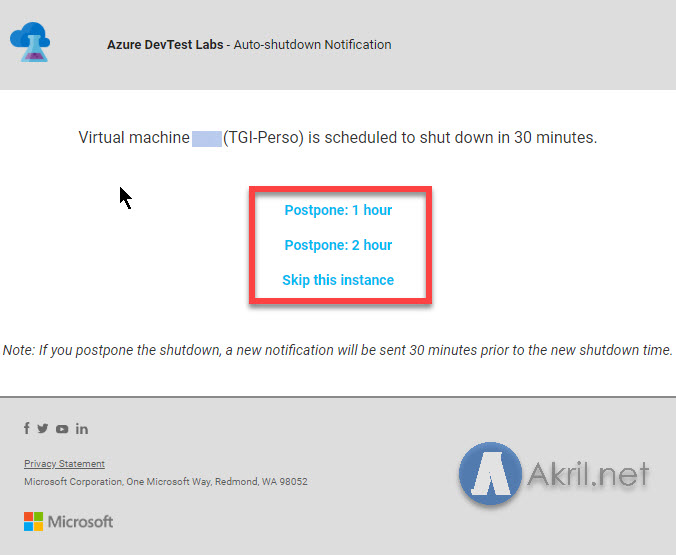
You can also choose to receive an email a moment before the automatic shutdown. This option might be useful if, for example, you want to delay the shutdown on a specific day. Because you will be able to postpone directly in the mail notification you will receive.
To be able to automatically start your virtual machine at a specific time we will need an Automation Account. Create a new Automation Account in your same Resource group where you’ve created your virtual machine. No specific option, just create it.
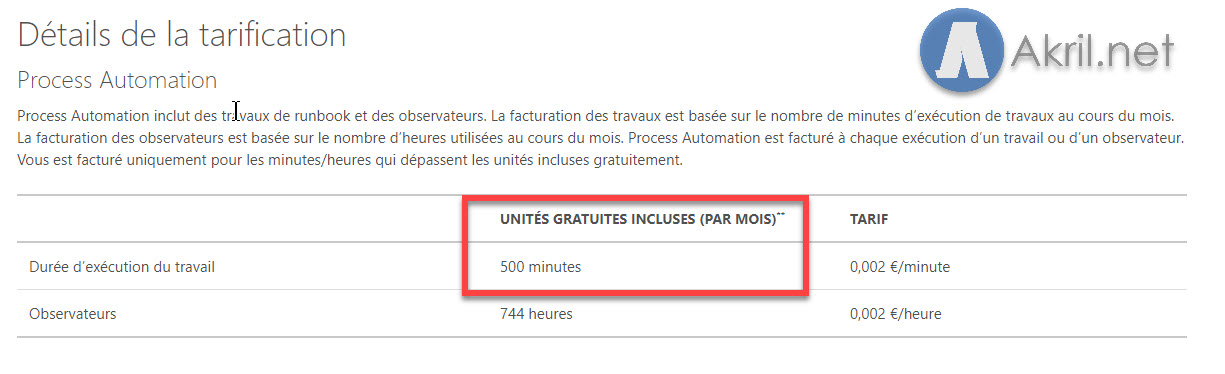
Note that this service is also a paid service but it’s a lot less expensive than running your virtual machine every day in one month. Besides, for a short script that will just start our VM: it will be free ! 😉
When your Automation Account is created. Go in it in Azure. Choose in the sub-menu « Process Automation » and go to « Runbooks« . You will find a set of default scripts, but we will create a new one.
Select Add a runbook.
Select the option Create a new runbook. Choose a name, PowerShell Workflow and a description. Finalize with the button Create.
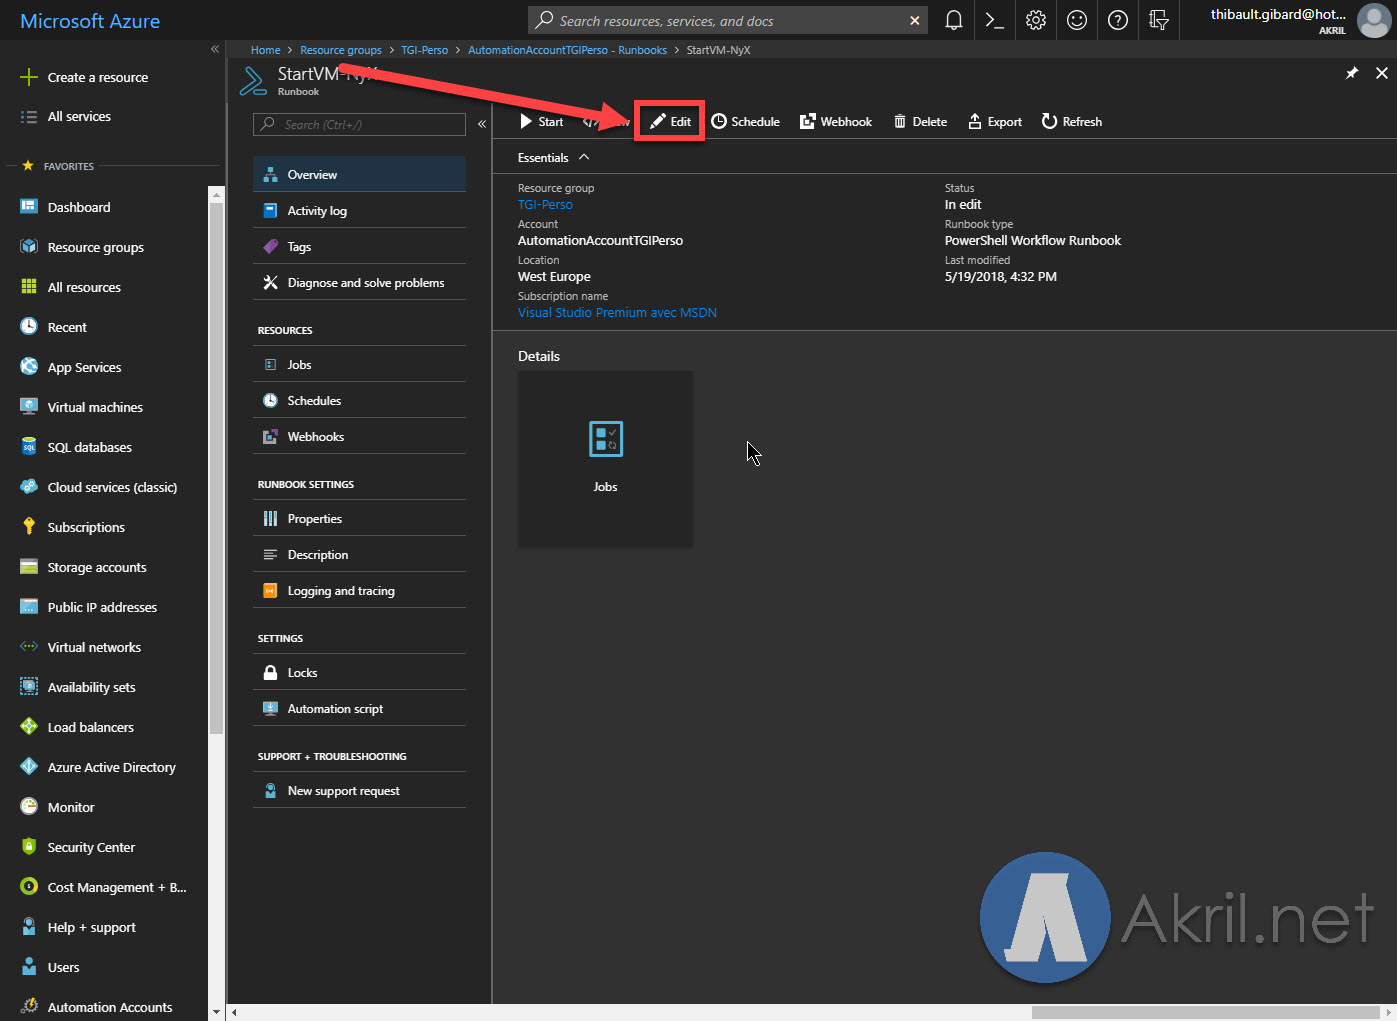
Then, click on the Edit button to create our code. You will see that it will be quite easy. Insert the 3 lines in your scripts between the brackets.
workflow StartVM-NyX
{
# Association to the Azure subscribtion
$Conn = Get-AutomationConnection -Name AzureRunAsConnection
Add-AzureRMAccount -ServicePrincipal -Tenant $Conn.TenantID -ApplicationId $Conn.ApplicationID -CertificateThumbprint $Conn.CertificateThumbprint

# Start the virtual machine
Start-AzureRMVM -ResourceGroupName "TGI-Perso" -Name "VM-Hostname"
}
In my example: TGI-Perso is my Resource Group. Don’t forget to adapt according do your settings. Same thing for the name of your virtual machine and the name of your workflow.
Save and Publish you script (top buttons).
Then, on the left go into the Schedules options. Select Add a Schedule. Choose the option Link a schedule for your runbook. After, Create a new schedule.
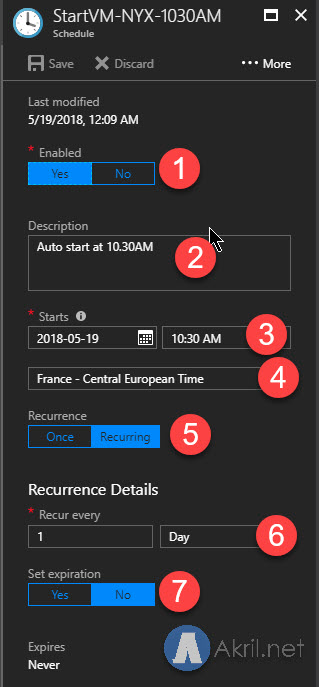
Give it a name, a description. Choose a time of beginning, a time zone, and the recurrence.
Now, your schedule is correctly linked to your script. You can just adapt the time to be able to test right now or you can wait until the next execution time to see if your virtual machine will be started or not.
Later, you can also check in your Activity Log tab. For example, if I’m looking on my specific VM I can see that it has been started and stopped on daily basis as expected automatically. This management helps me to save money on my Azure subscription.
In the above example, it corresponds to a VM that I’m using for a TeamSpeak server that is started only during the evening + night a few hours (and not the entire day).
If I’m taking back the example of my VM: B4ms. The cost per month announced by Microsoft is: 121,97 €. Let’s say one month is 31 days and one day is 24 hours. We have 744 hours / month. The cost of 121.97 € will be 744 hours / month.
But if I’m running only my VM from 10:00 AM to 1.00 AM each day. It will be like 16 hours a day. For 31 days x 16 hours it will be something like: 496 hours. In this logic, the price of this virtual machine will cost me something like 81 € which means it is 30 % less expensive.
It’s an example and maybe when you will read this article pricing would have been updated by Microsoft for my example. But the point is that these 3 lines of code can help you to decrease by more than 30 % the cost of your virtual machine (or save on your Azure credits)! 😉
Le lieu où installer un kit plug and play est essentiel pour garantir une production…
Vous souhaitez installer de panneaux solaires, mais vous hésitez entre le monocristallin et le polycristallin…
Adieu à l'Écran Bleu : Microsoft Réinvente l'Expérience Utilisateur après 40 Ans L'écran bleu, symbole…
Sortir du cloud Azure : L'Europe se tourne-t-elle vers OVH ? Sortir du cloud Azure…
OneDrive : Quand Microsoft Verrouille un Compte, 30 Ans de Fichiers Personnels Perdus OneDrive, le…
Télétravail : La Société Générale Réduit à 1 Jour par Semaine, une Tendance IT ?…